How to Install Wall Sconces without Wiring - Complete Guide

Step-by-step guide to install wall sconces easily and safely for a stylish lighting upgrade.

How to Install Wall Sconces

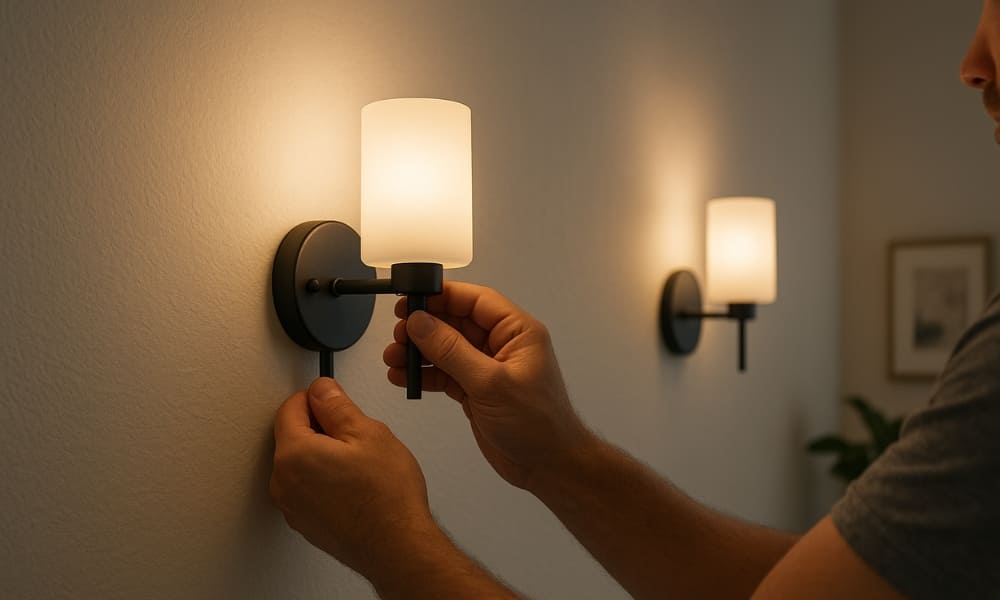
You can easily add stylish lighting to your home by installing wall sconces without the hassle of electrical work. You can do it yourself by following a few guidelines. Here are a few different methods, including using battery-operated sconces, plug-in models, and adhesive-mounted fixtures. The methods will help improve the ambiance of your home. Battery-operated sconces allow for portability and easy relocation. Without the need for professionals and electricians and without the hassle of damage, you can effectively light up your home by installing adhesive-mounted options. This will make your home aesthetically pleasing.

Overview 🔰

Tools and Materials Needed

  • Battery-operated or plug-in wall sconces
  • Screws and anchors (usually included with the sconce)
  • Drill and drill bits
  • Screwdriver
  • Level
  • Measuring tape
  • Pencil

Steps

Step 1: Choose the Location

Choose the right spot for your wall sconce. Choosing the right spot is very important. Choose a specific spot that enhances the room layout, existing light sources, and space. Choose a spot that fits in with the furniture in your room. Typically, sconces are mounted 60 to 70 inches above the floor. However, you can adjust this based on your preferences and the specific needs of the room. For example, in a living room, sconces can be placed at eye level when sitting. On the other hand, they can be slightly higher to provide diffused light in a hallway.

Step 2: Mark the Placement

After selecting a location, lightly mark the area on the wall where each sconce will be placed, using a pencil or marker if necessary. This will make your job easier. If you want to look professional, line up the marks and make sure they are secure. Use a level tool to check the marks and adjust as needed. This will ensure that your marks are straight and aligned.

Step 3: Install the Batteries

Install the batteries in the correct location according to the manufacturer’s instructions. After installing the batteries, test the sconces. Instead of breaking them down because of battery problems, make sure the sconces you have installed are working properly. You should test everything thoroughly after installing the batteries. The test will ensure that your sconces are installed correctly.

Step 4: Mounting the Sconc

Choose the appropriate method based on your wall type and the weight of the sconce. Use screws and anchors or adhesive strips/hooks to mount battery-powered wall sconces and make sure the sconces are firmly attached.

Method A: Using Screws and Anchors

  1. Drill holes: To place the drill holes, drill holes at the marked locations. This is essential to provide a stable hold for the anchors. Use a drill to install the anchors.
  2. Insert the anchors: Push the anchors into the drilled holes until they are flush with the wall. Position the anchors so that they provide additional support and the screws cannot damage the drill.
  3. Attach the mounting plate: Align the mounting plate with the anchors and screw it into place. The mounting plate is usually included with the sconce and serves as a base for attaching the fixture.
  4. Attach the sconce: Secure the sconce to the mounting plate following the manufacturer’s instructions. This usually involves sliding the sconce onto the plate or using screws to secure it in place. Seek professional help if necessary.

Method B: Using Adhesive Strips/Hooks

  • The adhesive strips or hooks should be kept clean and dry so that the hooks stick well to the wall.
  • Attach the adhesive strips or hooks to the back of the sconce or directly to the wall. Press firmly and make sure the bond is strong.
  • Once the adhesive has hardened, hang the sconce on the hook. Press firmly against the adhesive strips and make sure they are secure and tight before tearing.

Step 5: Test the Sconce

After installing the sconce, turn it on to make sure it is working properly. If the sconce does not work, check the battery installation or the mounting plate or adhesive connection.

Tips for Enhancing Your Space with Wall Sconces

  • Create symmetry: Place sconces next to areas like beds, mirrors, or artwork to enhance the ambiance of the room.
  • Layered lighting: Choose layers that add depth and light to the room. For example, use sconces with ceiling lights or floor lamps.
  • Consider style: Choose sconces that complement your home’s decor and furnishings. There are countless styles available on the market, from minimalist to vintage and modern to ornate.
  • Effective placement: Include sconces at intervals to provide ample light in areas like hallways or staircases.
  • Highlight features: Use sconces to highlight architectural features or focal points to add both light and visual interest to the room.

Tips for Best Results

  • Battery Life: Choose high-quality batteries to ensure long-lasting performance. You can connect rechargeable batteries for an eco-friendly option.
  • Light Bulb Type: Many battery-powered sconces use LED bulbs, which are energy-efficient and long-lasting.
  • Maintenance: Check the battery level regularly and keep it clean. Replace the batteries according to the instructions to maintain consistent lighting.

Creative Placement Ideas

  • Hallways and entryways: Add a soft, welcoming glow to these often dimly lit spaces.
  • Bedroom: Use sconces to brighten up your bedroom and create a cozy atmosphere.
  • Bathroom: Place sconces near mirrors for good lighting without the hassle of wires.
  • Living room: Include sconces to showcase artwork or create a cozy atmosphere.